Easy-Digi: DIY: Modifying
by KK6MRI and N6SX
This is a quick and crude set of instructions on modifying the Easy-Digi Kit to include a USB connection for control.
Before you start, you need to verify the connections between the dual jack and the board itself. Although most the kits we used had identical wire colors on the inside of the kit, we found a small percentage of kits had the wires crossed on the jack-end or on the PCB-end. With a meter, make sure of the follow and correcting any problems on the PCB-side:
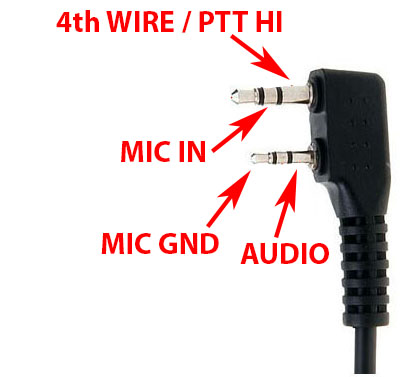
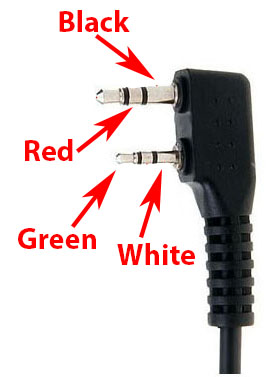
For this tutorial, we are going to use the following color scheme that matches the photos:
*** NOTE: the wire inside the cable is black, but the jumper we used is yellow ***
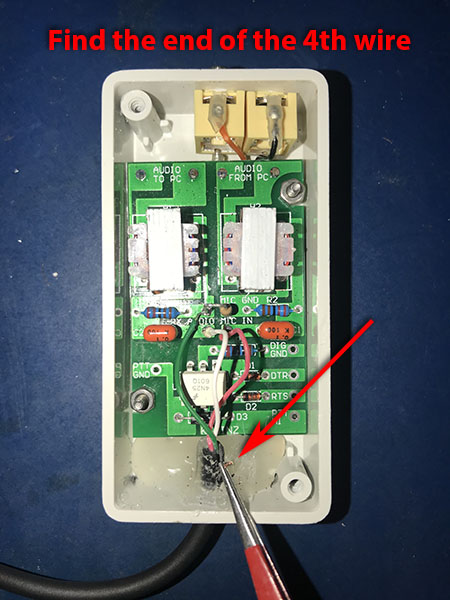
After verifying the wires are correctly connected, you will need to carefully remove enough of the hot glue to expose the fourth wire from the cable. If you would like a more “clean” looking interior, you can use some rubbing alcohol to remove the hot glue. Soak a Q-Tip in some rubbing alcohol then apply it to the edges of the hot glue. After 10 minutes or so, it should dislodge the hot glue from the enclosure.
After exposing the fourth wire, make a jumper from the fourth wire to PTT HI on the board.
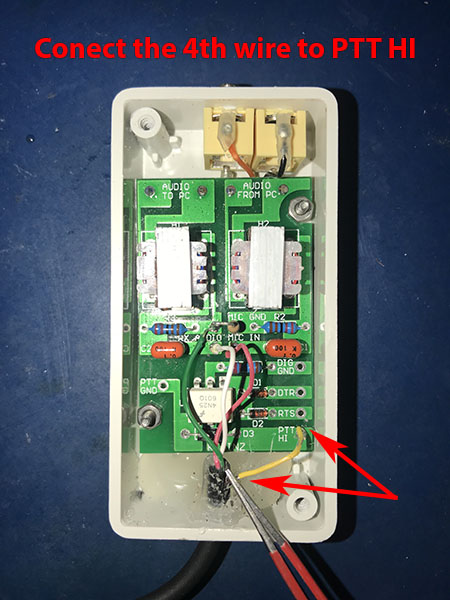
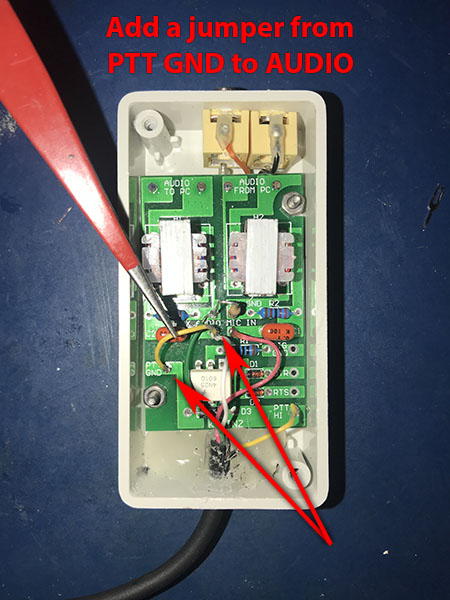
Add a jumper from PTT GND to Audio (it will share the connection with the white wire in this example).
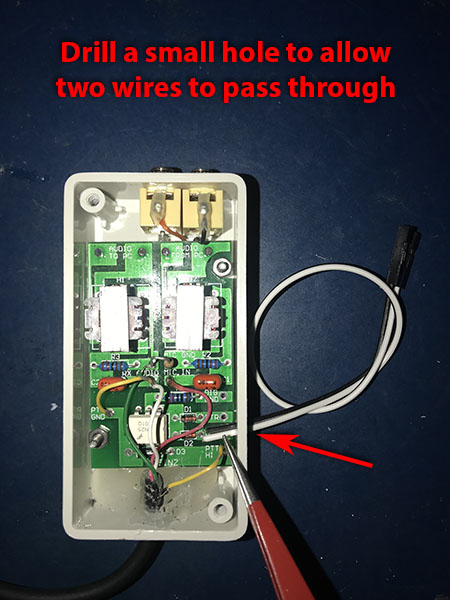
Drill a small hole large enough to be able to push two wires through it.
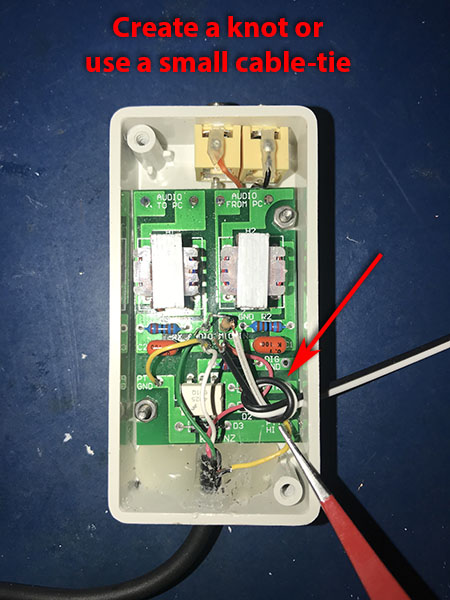
To prevent the cable from breaking its connection on the inside once soldered, tie a knot or use a cable/zip tie.
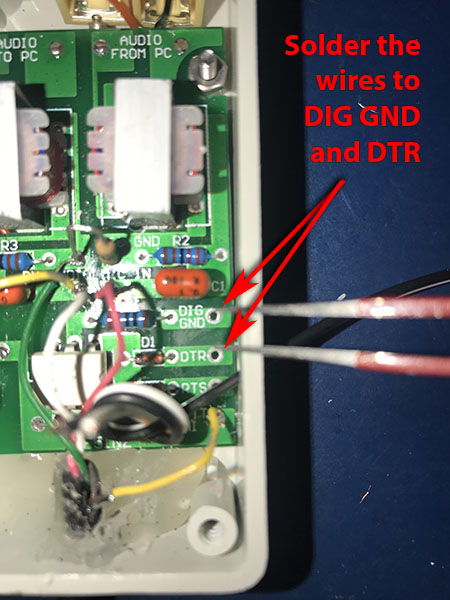
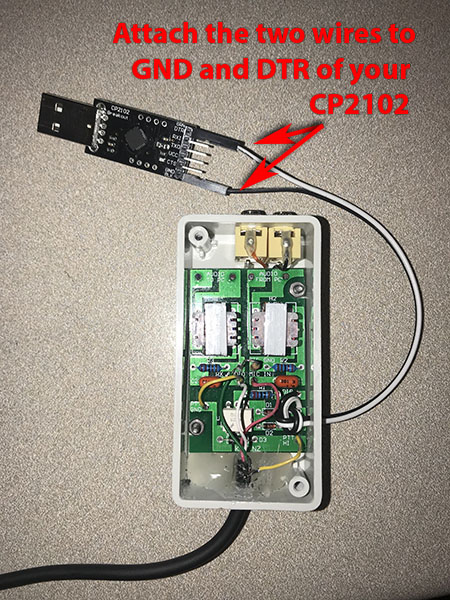
Solder one wire to DIG GND and the other wire to DTR. Make note of which color wire is connected to DIG GND and label the end of the wire outside of the enclosure. Doing so will remove any question to anyone using the kit of which wire is GND.
To test your fine soldering job, attach the wires to GND and DTR on your CP2102.
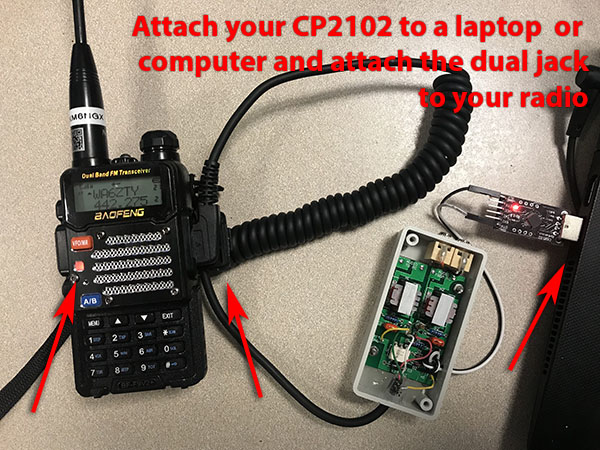
Connect the CP2102 to a laptop or computer and the dual jack to your radio. If everything is okay, the PTT light on your Baofeng radio should illuminate orange.
You’re done! Close it back up, attach the audio cables, and start having fun!
KK6MRI and N6SX for NU6XB